September 1, 2026
Repotting a Basal Phalaenopsis Keiki
How to separate and repot a basal Phalaenopsis keiki once it has viable roots, using support and an airy potting mix.
By Vigi
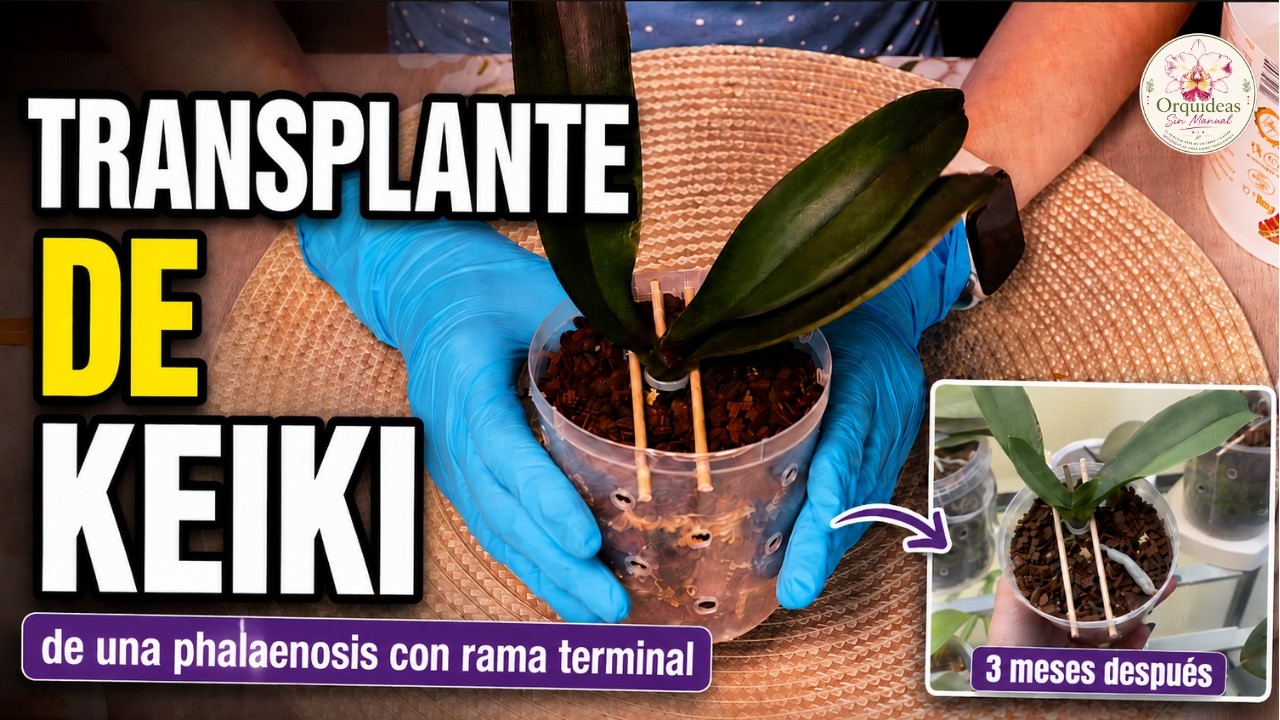
Separating a basal Phalaenopsis keiki takes patience. This keiki developed next to a terminal spike and took several months to produce roots. Once it had approximately five viable roots, it was ready to be separated and placed in its own pot.
🌱 When should you separate a keiki?
The keiki developed roots slowly. For about two to three months, sphagnum moss was placed around its base to encourage them. The decision was not based only on the keiki growing: it was allowed to develop enough viable roots to support itself better in its own pot.
In this case, approximately five viable roots indicated that the time had come. Each plant develops at a different pace, so observe the actual root development instead of following a fixed calendar.
🧰 Materials for the repot
The process used:
- A recycled transparent pot.
- Drainage and ventilation holes in the container.
- Radiata pine bark in different sizes.
- Charcoal.
- Pre-hydrated sphagnum moss.
- A small cable tie and several sticks to support the keiki.
The goal was an airy medium that could retain some moisture around the young roots, which were still few and could not stabilize the plant by themselves.
🔎 Preparing the pot and support
First, one support stick is placed beside the plant and secured with a cable tie. The tie should hold the keiki firmly without being too tight or marking its tissues. The excess is then cut away.
This support matters because a plant that moves constantly may struggle to establish new roots. Stability lets the roots attach to the mix without unnecessary movement.
If you need to make holes in a plastic container with a soldering iron, work very carefully. In the video, the tip reaches approximately 400 ºC: do not touch it or bring it close to the plant, and work in a well-ventilated space to avoid inhaling fumes from heated plastic.
🪴 Filling the pot step by step
- Place some pieces of pine bark at the bottom.
- Alternate bark with small amounts of sphagnum moss to create layers.
- Position the keiki approximately in the center of the pot.
- Add bark and moss gradually around the roots.
- Check that the plant is stable enough.
- Finish with a top layer of pine bark.
The sphagnum helps keep moisture somewhat more stable around the roots. The bark preserves air spaces. The top layer of bark also reduces direct light on the damp moss, which helps limit algae or green growth and leaves the repot looking cleaner.
📌 Adding more support points
After checking the plant’s stability, two more sticks were added. This required making additional holes in the container. The result was a plant with several support points and much less movement inside the pot.
The cable tie and sticks are temporary supports. Their role is to help the keiki while its roots continue growing and begin anchoring it to the new mix.
💧 First watering and progress
Once the repot was complete, the keiki was watered for the first time. During the following weeks, the important thing was to observe how the roots responded to the new mix.
Three months later, the keiki had continued developing its roots; some had already reached the pot walls and the outside of the container. It had also produced new leaves, suggesting that the separation had gone well.
🎬 Key moments in the video
- 00:00: introduction and the decision to separate the keiki.
- 00:24: repotting materials.
- 01:18: the first support stick.
- 01:57: filling the pot.
- 03:15: adding extra support sticks.
- 04:13: first watering.
- 04:24: progress three months later.
Separating a keiki is not only about detaching it from the mother plant. Roots, stability, and a mix that balances moisture with airflow all help it continue growing independently. To compare this process with other repotting guides, read Repotting a Phalaenopsis step by step and How to care for your Phalaenopsis at home.